ReAmiga 1200 - sourcing parts
- Description
- Task 1: Donor board and ATX Build
- Task 2: Diagrom tests to asses state of components from donor board
- Task 3 - Input Keyboard and Mouse
- Task 4 - Diagrom take 2
- Next Steps
- References
Description
There has been a lot of interest in retro computing in recent years, more so with people spending a lot of time indoors lately! Ive seen many articles and blogs in the past year on new Amiga releases, one in particular got me very interested in the new Amiga boards, specifically the reamiga 1200 boards.
Amigas were a huge part of computing history, this was down to the groundbreaking Amiga 500, for its time. Amigas still have a large and active community and this was very clear in 2019 when Linus responded to an Amiga commit to the Linux kernel with ‘Christ. Will that thing never die?’.
Having completed the BEEB repairs the reamiga looked like a challenging long term project. First steps were to actually get an amiga 1200. I did not want to break a working machine apart so i tried sourcing individual parts. I would need a case keyboard, mouse and motherboard. Its taken 5 months but I have got really lucky and saved a lot of money in the process. Working 1200s go for 4-500 i have seen unknown state or for parts easy go for 250. So far I am at 140 and it works (mostly).
Task 1: Donor board and ATX Build
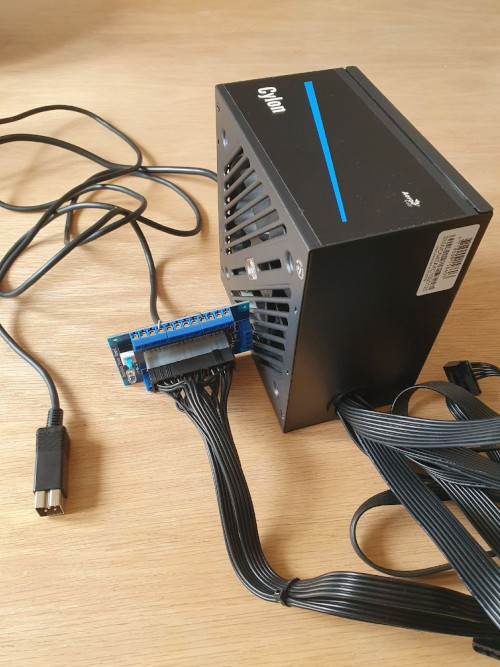
I won a bid on a 1200 board REV 1.D4. The photos seemed to show missing legs on chips but having received the board it was actually in good condition. Though listed parts not working and photos appear to show missing legs which might have put others off, the IC/chips actually looked fine. Seeing the corrosion around the video output area of the board i expect this to have no picture so the first task was to see what state the board was in. To do this i made up a power lead and got diagroms + serial cables.
Using an ATX breakout board, take ground, 5v, 12v and -12v signals from ATX power supply to cable attached to an Amiga 1200 square 5 pin dim.
ATX POWER
| Signal | ATX | Amiga Square pin lead |
|---|---|---|
| +5V | Red | Red |
| GND | Black | Black |
| +12V | Yellow | Brown |
| -12V | Blue | White |
You can hack an ATX power supply cutting back the wires as a permanent solution. I chose to use a cheap break out board on any atx. I didnt have a 5 pin dim but you can pick them up new cheap and easily solder to new cable. In my case i found a cable with wire colours matching the amiga from the table above, looking like new original.
The results:
 |
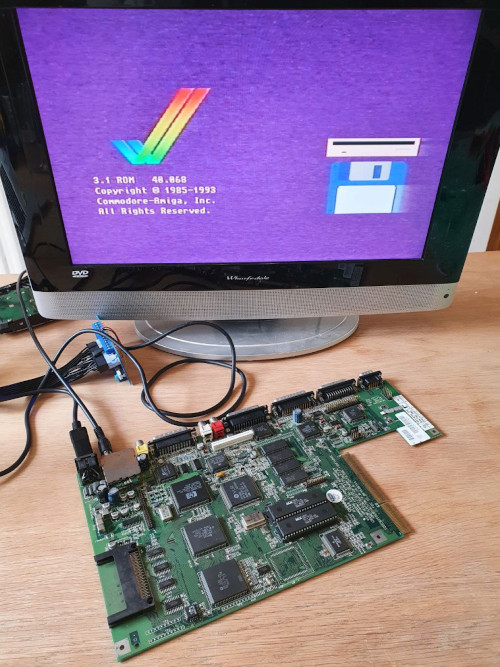 |
At first it did not come on but after some board cleaning, a lot of grime removed with cotton buds, i got a successful start! Turns out the board self tests and loads kickstart roms perfectly fine. This means its passing the following self tests :
These colours indicate a problem:
- Red – Bad Kickstart-ROM
- Green – No chip RAM found, or it is damaged
- Blue – Custom chip problem (Denise, Paula, Agnus)
- Yellow – Mostly a bad CPU (no trap routine) or a bad Zorro expansion card. CPU exception error before the “Guru Meditation” trapping software was enabled.
- Light green – CIA problem
- Light Grey – If it stops at grey, the CIA may be defective
- Black/stripes – ROM or CIA problem
- Black – No video output.
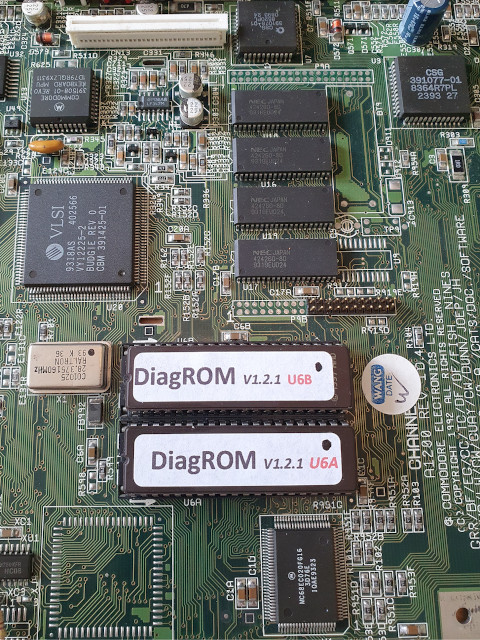
Task 2: Diagrom tests to asses state of components from donor board
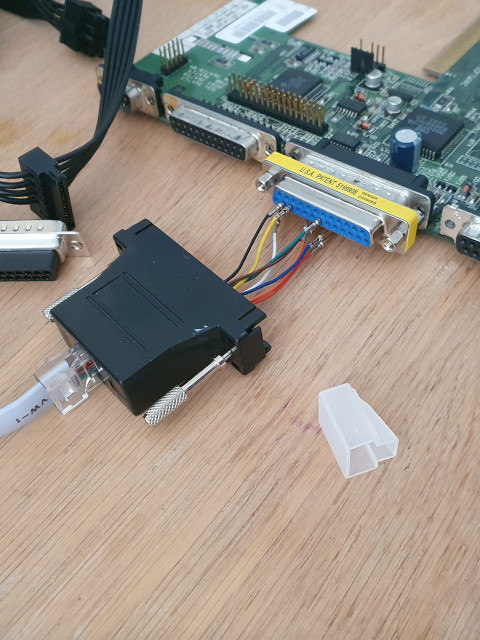
At this point I did not have a keyboard or mouse yet but i did have console cable for network equipment so i setup an RJ45 to RS232 DB25 connector. You only need TXD RXD and GND. I expected serial with the diagroms to be bi directional but it would appear its just for boards with dead displays so i couldn’t do any tests yet. But this will come in useful later during the build when all i have for output is serial on the board!
Table and setup below.
Make a console to RS232
| name | rj45 console | rs323 | DB25 |
|---|---|---|---|
| RTS | 1 | CTS 5 (blue) | 4 |
| DTR | 2 | DSR 6 (orange) | 20 |
| TXD | 3 | RXD 3 (black) | 2 *required |
| GND | 4 | GND 7 (red) | 7 |
| GND | 5 | GND 7 (green) | 8 *required |
| RXD | 6 | TXD 2 (yellow) | 3 *required |
| DSR | 7 | DTR 20 (brown) | 6 |
| CTS | 8 | RTS 4 (white) | 5 |
 |
 |
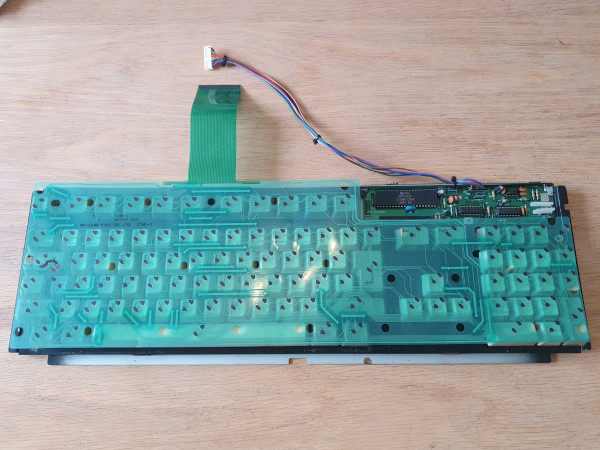
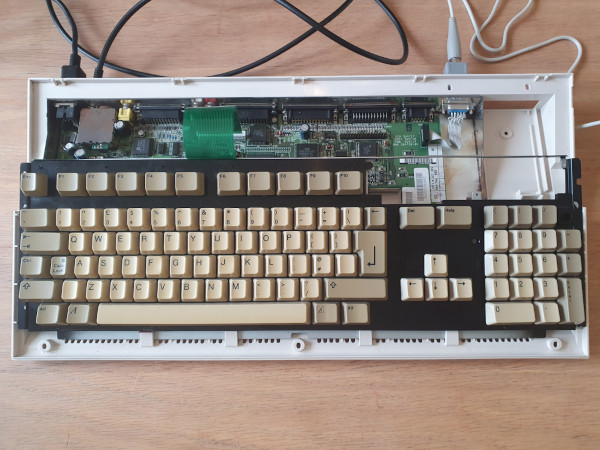
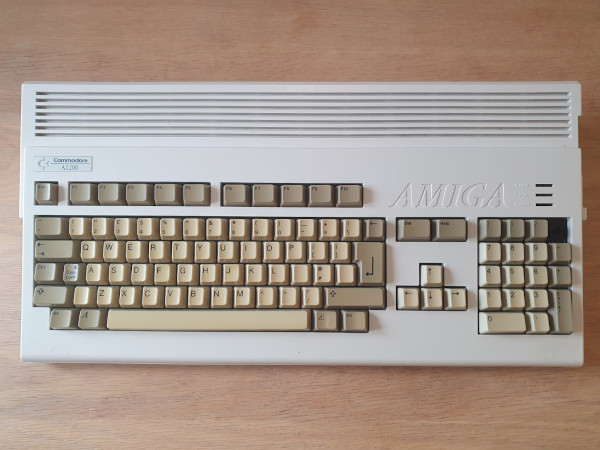
Task 3 - Input Keyboard and Mouse
Okay before reading this i should explain, if i was refurbishing i should absolutely use an 1200 keyboard, as this is not going to be 100% authentic 1200, you should expect me to take some liberties before reading on!
A1200 keyboards are not cheap! But broken 500 boards come up often, have the same dimensions and are mechanically identical. You can wire a 500 keyboard into a 1200 board but it requires soldering. Knowing this i also picked up a 1200 keyboard membrane, not a new hard one but used. I went for used to save on costs also there are keyboard projects in the works in the community and there is a chance new keyboards will be available in future which I would probably prefer. Why ? well community efforts usually strive for more robust replacements.
I also got a cheap PS2 ball mouse and quadrature adapter, you can get new USB mouse converters but they are x3 the cost plus the ball mouse is more authentic!
You can use SmallyMouse2 i believe, i have one for my acorn but i didn’t want to change it for the Amiga serial connector. Specific documentation for amigas at the following link https://www.waitingforfriday.com/?p=827#Commodore_Amiga
The membrane had no continuity, after cleaning the ribbon everything came to life! It will need repairs for the space bar, keypad keys 6,7,8 and a replacement * key. I suspect the trace has gone for the space bar. The 6,7,8 might just be a case of needing grime removed much like the ribbon end.
 |
 |
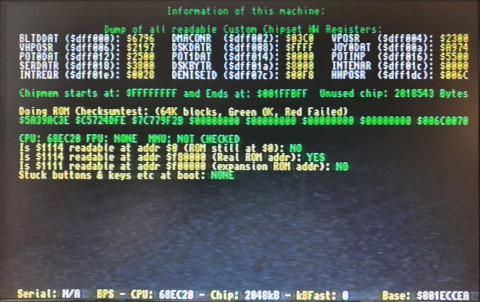
Task 4 - Diagrom take 2
And now some tests. As this is a stock board with 2MB of chip ram, you can ignore the memory errors, instead use the extended tests. I didn’t have to look far to find user with experience :
http://eab.abime.net/showthread.php?t=97881
I have a 1.2 DiagRom I have used on both an A500 and A2000 and it does the same so wouldn’t worry about it. I would advise to run the extended test as it gives you a graphical output of what it is checking and if it finds any errors.
 |
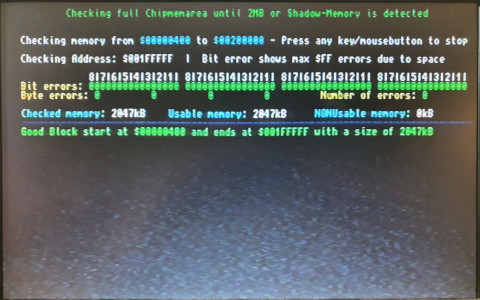 |
So far so good. I can be very confident that the important components are working before migrating them to a reamiga v1.5 board. Although i only show info and checksum of the 2MB chip ram above, the audio channels worked, the graphics tests worked, i could not find any faults other than what i already knew regarding the keyboard membrane issues.
Next Steps
Given i pretty much have a 1200 now I am thinking instead of jumping into doing the migration and build ill instead get a compact flash card and IDE adapter and setup the card for workbench. There should be no issues booting from the card and let me do a final check on stability and tick off IDE working (leaving just the floppy untested).
I think the only risk to this is the age of the capacitors on the donor board so im not planning on keeping it on for long, i can already see how much interference there is in the video signal and i guess this is down to lack of smoothing from the current caps.
This brings up another to do, pickup a SCART cable, RF was dirty on my acorn too and the SCART for that and the beeb is another world. Product here: COMMODORE-AMIGA-SCART-TV-CABLE
References
Article covering community efforts : https://hackaday.com/2020/06/16/why-you-probably-wont-be-building-a-replica-amiga-anytime-soon/
Community news of ReAmiga see page 14 ‘Introducing the Re-Amiga’ http://amigaguiden.no/AmigaMAD-62-2018-01.pdf
PCB Explorers : http://amigapcb.org/
Schematics: https://www.amigawiki.org/dnl/schematics/A1200_R1.pdf
Custom chips : https://bigbookofamigahardware.com/bboah/CategoryList.aspx?id=40
Table of boards and chip variants: https://www.amiga-stuff.com/hardware/amigaboards.html
Board pictures : https://amiga.resource.cx/mod/a1200.html